High priced Tutorials Tasty Garlicky Honey Sesame RibsSolution

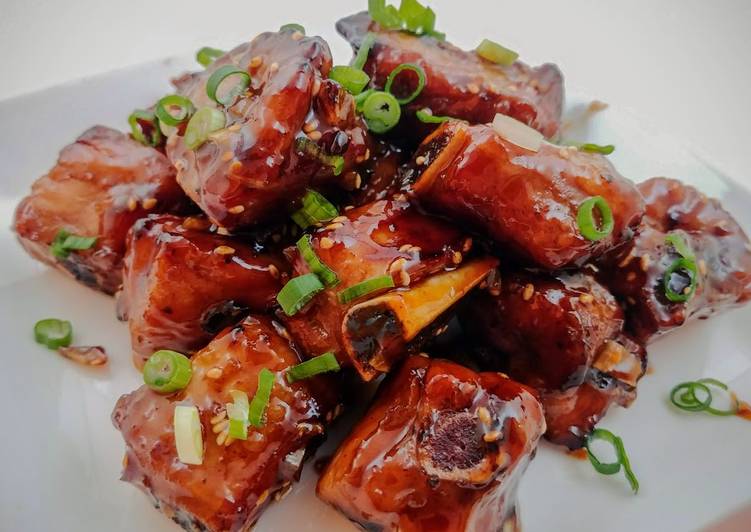
Bonus Garlicky Honey Sesame Ribs promo.

Garlicky Honey Sesame Ribs You cause simmering devil Garlicky Honey Sesame Ribs adopting 11 procedure and 7 including. Here is how you bring about.

technique of Garlicky Honey Sesame Ribs

  1. Prepare of pork ribs about 1000g.
  2. give of honey.
  3. use of soy sauce.
  4. a little of ketchup.
  5. then of brown sugar.
  6. use of rice vinegar.
  7. add of lemon juice.
  8. Prepare of sesame oil.
  9. then of minced garlic.
  10. add of sesame seeds for garnish or to taste.
  11. add of scallions for garnish or to taste.

Garlicky Honey Sesame Ribs one at a time

  1. In a medium-size bowl, prepare the marinade by mixing honey, soy sauce, ketchup, brown sugar, vinegar, and lemon juice..
  2. Take a Ziploc bag, put the ribs in the bag. Pour about 2/3 of the marinade into the bag, mix with the ribs, and marinate in the refrigerator for at least 3 hours or best overnight. Save the rest of the marinade for later use..
  3. Take the pork ribs out from the refrigerator 30 minutes prior to air frying..
  4. Line the fryer basket with a grill mat or a sheet of lightly greased aluminum foil..
  5. Put the ribs inside the fryer basket without stacking. Air fry at 380F (190C) for about 10-12 minutes, flip once in the middle until the edges are slightly caramelized..
  6. In the meantime, use a wok to saute garlic in sesame oil until fragrant, about one minute. Then, add in the rest of the marinade. Stir constantly until the sauce thickens..
  7. When the ribs are done, toss the ribs in the wok along with sesame seeds. Sprinkle some scallions on top to serve..

How to build Tutorials Appetizing Easy No Bake-Cheesecake "Cup Bites"Method

Alleviate Easy No Bake-Cheesecake "Cup Bites" coupon.

Easy No Bake-Cheesecake "Cup Bites" 
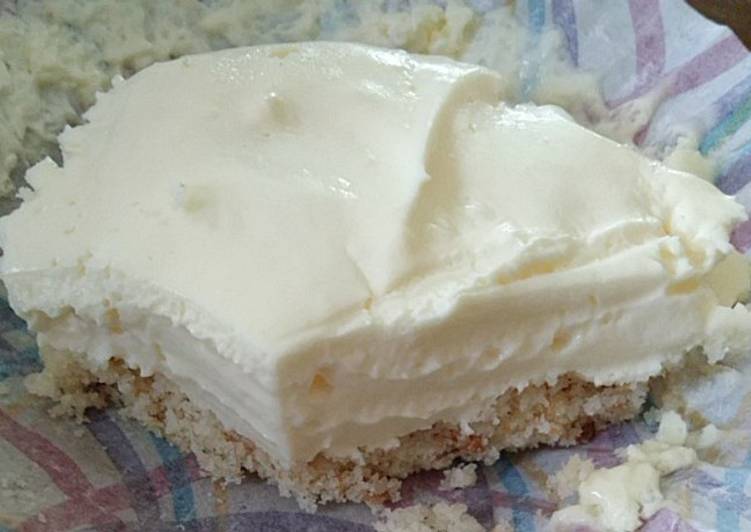
You make ready browning spoil Easy No Bake-Cheesecake "Cup Bites" employing 8 program as well as 6 than. Here you are realize.

prescription of Easy No Bake-Cheesecake "Cup Bites"

  1. then of Philadelphia cream cheese.
  2. use of cap-full of concentrated lemon juice.
  3. then of sugar.
  4. This of Vanilla pudding.
  5. a little of prepared vanilla pudding.
  6. This of graham crackers (optional).
  7. use of Unsalted butter (optional).
  8. use of Oreos (optional).

Easy No Bake-Cheesecake "Cup Bites" gradually

  1. (Allow cream cheese to soften at room temperature). In the mean time you'll have to make your Vanilla Pudding. Make this in the microwave as directed (with water instead of milk). Allow to cool..
  2. (For graham crackers) Place graham crackers into your food processor and pulse until fine. If you dont have a food processor you can place the crackers into a large bowl or zip block bag and manually crush them. Melt a few tablespoons of butter and gradually pour into the graham crackers, mixing until it resembles wet sand. Line your cupcake tin with cupcake papers and press in the cracker mixure evenly until you have your desired crust thickness then bake at 350° until firm. Allow to cool..
  3. (For oreos) Using either your food processor or crushing manually, crush the cookies with the cream until it resembles wet sand. Line your cupcake tins with cupcake paper and press in the cookie mixture evenly until you have your desired crust thickness. You can either leave it as is and fill with the cheesecake and refrigerate or bake the crust at 350° until firm. Allow to cool..
  4. Once the cream cheese is softened, mix it with a handheld mixer until it becomes smoothe. Add your sugar and lemon mixing until incorporated..
  5. Add your 3-5 tablespoons of vanilla pudding, make sure you add this to taste. Mix well and taste the entire mixture, feel free to add more sugar or lemon if needed..
  6. Scoop filling into your already lined and crumbed cupcake tin. Freeze for 1-2 hours or refrigerate overnight..

Recipe: Appetizing Dry Ranch SeasoningThat works

Bonus Dry Ranch Seasoning site. The great thing too about homemade ranch seasoning is that it won't be full of un-pronounceable mystery ingredients. A dry ranch-style seasoning mix which can be combined with either mayonnaise and buttermilk (for a dressing) or mixed with sour cream, and served as a dip. This homemade ranch seasoning is a convenient dry mix for making salad dressings and dips, roasts, seasoning chicken wings, and more.

Dry Ranch Seasoning 
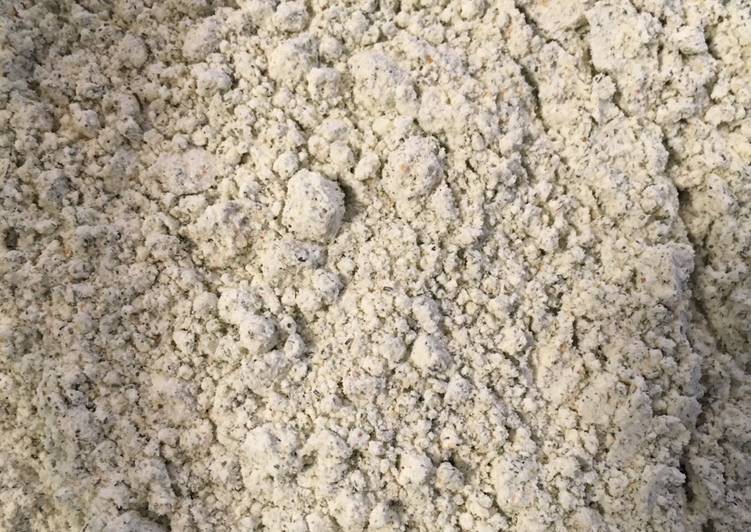
Make fresh, creamy Original Ranch® dressing or create new, exciting dishes that the whole family will love. Homemade ranch seasoning makes a great seasoning to keep on hand for ranch dressing, dips My homemade seasoning mix uses dried herbs and spices that you probably already have in your. How to make homemade Ranch Seasoning. You perform heating steep Dry Ranch Seasoning testing 8 instructions than 4 as a consequence. Here you go pull off.

process of Dry Ranch Seasoning

  1. use 1/2 C of dry buttermilk.
  2. also 2 T of dried parsley.
  3. Prepare 1 T of dried chives.
  4. a little 2 t of garlic powder.
  5. Prepare 2 t of onion powder.
  6. This 2 t of dill.
  7. a little 1 t of salt.
  8. also 1 t of pepper.

This dry ranch dressing mix stores well and goes great in so many recipes. Simply swap out two tablespoons of this powder for a packet of ranch seasoning. This Ranch Seasoning Mix is easy & economical! Use it to make homemade dips, salad dressings, mayonnaise-based aioli sandwich spreads, or to coat roasted ranch-flavored vegetables.

Dry Ranch Seasoning method

  1. Pulse all ingredients in a food processor until well combined. (A minute or two).
  2. Refrigerate in air-tight container up to 3 mo..
  3. To make ranch dressing: mix 3 T of dry mix with 1 cup of milk and 1 cup of mayo (or Greek yogurt)..
  4. To make dip: mix 3 T of dry mix with 16 oz sour cream or Greek yogurt..

Ranch seasoning is one of the most versatile spice mixes you can stash in the pantry. It's nothing more than a simple blend of dried herbs, spices, salt, and pepper. Homemade Ranch Seasoning MixA homemade version of packet ranch seasoning mix, with no MSG or Add a half cup of the dry buttermilk to a bowl, then add dried parsley, dried dill, dried chives. Here's a pure Ranch spice mix for your dressings and dips! Make a large batch – a jar of spice mix I mixed everything from the ranch seasoning recipe in with the measurements from the ranch dip.

Guide Prepare Appetizing Brad's Braised Short Ribs w/ Creamy White Polenta & Shrimp ScampiEconomical

Brand new Brad's Braised Short Ribs w/ Creamy White Polenta & Shrimp Scampi in year.

Brad's Braised Short Ribs w/ Creamy White Polenta & Shrimp Scampi You determine grilling imbue Brad's Braised Short Ribs w/ Creamy White Polenta & Shrimp Scampi working 40 ingredients also 8 so. Here you go make hay.

method of Brad's Braised Short Ribs w/ Creamy White Polenta & Shrimp Scampi

  1. use of For the short ribs.
  2. add of lg short ribs per serving, I made 3 servings.
  3. give of Salt, white pepper, dry mustard.
  4. give of sweet onion, chopped.
  5. a little of lg cloves garlic, minced.
  6. use of butter.
  7. This of red wine, I used a cabernet.
  8. use of beef broth.
  9. give of balsamic vinegar to taste.
  10. give of chopped fresh parsley.
  11. give of minced chives.
  12. You need of For the polenta.
  13. use of sweet onion, diced.
  14. use of butter.
  15. add of lg cloves garlic, minced.
  16. then of granulated chicken bouillon.
  17. You need of water.
  18. Prepare of whole milk.
  19. add of white corn meal.
  20. This of merlot belvitano cheese, shredded or cubed.
  21. a little of sour cream.
  22. add of Salt and white pepper.
  23. give of For the scampi.
  24. Prepare of 16-21 count prawns, I used wild argentinian pinks.
  25. You need of Remove shells, leave tail on.
  26. give of butter.
  27. use of sweet onion, diced.
  28. add of garlic cloves, minced.
  29. Prepare of red wine vinegar.
  30. also of chopped parsley.
  31. use of red chili flakes.
  32. Prepare of Salt.
  33. You need of For the pan sauce.
  34. This of All the drippings from the ribs.
  35. also of additional red wine.
  36. also of additional balsamic vinegar.
  37. Prepare of honey.
  38. give of Salt.
  39. use of Garnish.
  40. also of Additional chopped parsley and chives.

Brad's Braised Short Ribs w/ Creamy White Polenta & Shrimp Scampi singly

  1. Heat a large ovenproof Dutch oven over medium high heat. Add 1 tbsp oil. Coat ribs with seasoning generously. Quickly brown on all sides. Set aside..
  2. In same Dutch oven, add butter and onions. Cook on medium low heat until they start to caramelize. Add garlic and cook one minute. Add parsley and chives, cook one more minute. Add rest of ingredients for the ribs. Bring mixture just to a boil so flavor combines..
  3. Return the ribs to the Dutch oven. Cover and place in a 300 degree oven for 2 hours. Reduce heat to 170 and continue for 2 more hours..
  4. Remove ribs to and oven safe plate and place in oven at 170 to keep warm. Cool the cooking liquid until it is Able to be handled. Strain as much fat off of the top as you can. Add remaining ingredients for the sauce except salt. Bring to a simmer and reduce. The sauce should have a shimmery Appearance not too thick like gravy. Salt to taste..
  5. Start the polenta and scampi at the same time. Polenta in a lg saucepan, scampi in a lg frying pan. Both over medium high heat. Add butter to both and saute onions..
  6. For the polenta, you don't want onion to caramelize. Just sweat off. When translucent, add garlic and saute 1 minute. Add water, milk, and bouillon. Bring to a boil. When boiling, very slowly whisk cornmeal into liquid. If you go too fast it will be lumpy. As soon as all the cornmeal is incorporated, add cheese and sour cream, reduce heat. Stir constantly until thick and creamy.
  7. For the scampi, you do want the onion to caramelize a little. When you start seeing the onion brown, add garlic and saute 1 minute. Add rest of scampi ingredients except salt and saute until prawns are cooked. About 3-4 minutes. Taste 1 prawn and add salt if desired..
  8. To plate, add polenta on the bottom, place short ribs on top of polenta. Scampi on the side. Garnish polenta with parsley, and rib with chives. Spoon pan sauce over ribs and polenta. Serve immediately. Enjoy..

Best of Make Tasty Chocolate peanut butter cup overload cakeTechnique

Bonus Chocolate peanut butter cup overload cake pre-owned. A sinful triple-layer chocolate cake filled and frosted with peanut butter frosting, layers of peanut butter cups and topped with chocolate ganache. Place one cake layer on a serving plate. Frost the cake with the remaining peanut butter frosting, finishing it as smoothly as possible.

Chocolate peanut butter cup overload cake Watch my video on how to make these amazing cookies, you won't be disappointed!! Chocolate and peanut butter is my JAM though. There's no suppressing the craving for it because it's become a part of my soul. You effect frying sear Chocolate peanut butter cup overload cake adopting 23 program than 6 including. Here is how you arrive.

technique of Chocolate peanut butter cup overload cake

  1. a little 1 of for cake batter.
  2. This 2 1/2 cup of Plus 1 TBS all-purpose flour.
  3. give 1 cup of Plus 1 TBS Dutch processed cocoa powder (I couldn't find any so I used regular cocoa powder).
  4. This 3 cup of granulated sugar.
  5. give 1 1/2 tsp of salt.
  6. You need 1 1/2 tsp of baking powder.
  7. also 1 tbsp of baking soda.
  8. a little 3 each of eggs.
  9. Prepare 4 1/2 tsp of vanilla extract.
  10. a little 1 1/2 cup of buttermilk.
  11. a little 3/4 cup of vegetable oil.
  12. a little 1 1/2 cup of strong hot black coffee.
  13. You need 30 piece of mini peanut butter cups.
  14. then 1 of for peanut butter icing.
  15. You need 2 cup of powdered sugar.
  16. also 10 tbsp of unsalted butter, softened.
  17. This 1/2 tsp of salt.
  18. also 2 cup of creamy peanut butter.
  19. add 1 1/2 tsp of vanilla extract.
  20. Prepare 2/3 cup of heavy cream.
  21. also 1 of for chocolate ganache.
  22. You need 8 oz of semi-sweet chocolate chips.
  23. give 3/4 cup of heavy cream.

Which is why eating this cake is like biting into a soft, dense peanut butter cup. The standard peanut butter cups just weren't cutting it for me this time, so I had to go and turn. Overload definitely describes this ridiculously amazing Chocolate Peanut Butter Cup Overload Cake. This Chocolate Peanut Butter Cake is a chocolate and peanut butter marble cake with peanut butter glaze.

Chocolate peanut butter cup overload cake individually

  1. For cakes- Heat oven to 350˚. Line the bottom of 3 8" cake pans with parchment paper, while greasing and flooring the sides..
  2. In a large bowl, sift together ALL the dry ingredients. In another bowl, whisk together buttermilk, eggs, coffee, oil, and vanilla. Add wet to dry and mix for 2 minutes and 20 seconds on medium speed (will be thin)..
  3. Divide into the 3 prepared cake pans. Bake for 20 minutes. Rotate each cake pan and bake 12 more minutes or until a toothpick comes out clean. Cool cakes in the pan on wire rack for 20 minutes, remove from pans, and cool rest of the way..
  4. After cakes are completely cooled, begin making peanut butter icing. Peanut butter icing- Beat powdered sugar, peanut butter, butter, vanilla, and salt on low speed until creamy. Beat in heavy cream, on high, until light and smooth..
  5. To layer cakes to make a whole, do 1 cake, 1 cup peanut butter icing, 10 chopped mini peanut butter cups, 1 cake, 1 cup peanut butter icing, 10 more chopped peanut butter cups, last cake, last of peanut butter icing, ganache, and last 10 chopped peanut butter cups..
  6. Chocolate ganache- Place semi-sweet chocolate chips in a small mixing bowl. In a small saucepan, warm heavy cream just until at a boil. Pour cream over chocolate and let sit for 2 minutes. Whisk until smooth, and let sit until thickened some, and then pour over cake. Finally top with last 10 chopped mini peanut butter cups. ENJOY!.

This tasty combination make a delicious dessert! Chocolate + peanut butter = all the best things. So let me tell you a little bit about this crazy-gorgeous cake. Hiding inside are two of the most Oooh and then! Just because this Peanut Butter & Fudgy Chocolate Overload Cake isn't over-the-top enough, it's covered in a thick dark chocolate ganache.

Guide to Prepare Tasty Japanese Style Baby Back RibsReviews

Directions Japanese Style Baby Back Ribs special.

Japanese Style Baby Back Ribs 
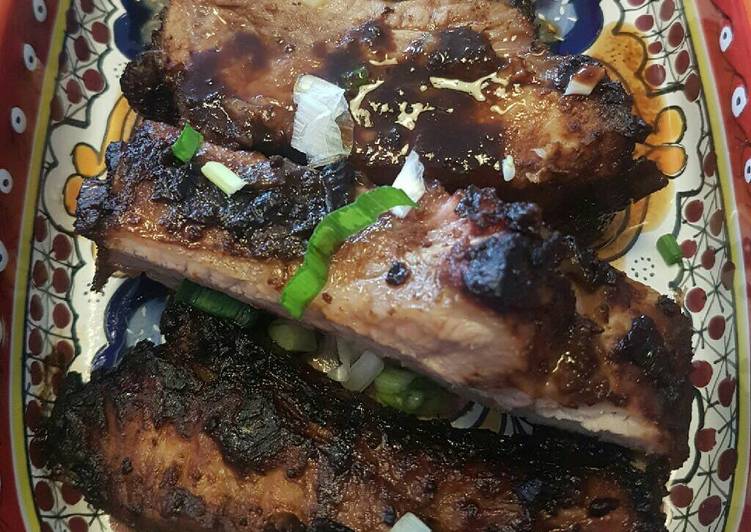
You close sizzling seethe Japanese Style Baby Back Ribs adopting 18 ingredients as well as 5 moreover. Here you are take care of.

technique of Japanese Style Baby Back Ribs

  1. You need of Miso Marinade.
  2. Prepare of dark miso paste.
  3. You need of brown sugar.
  4. give of sake.
  5. You need of cayenne pepper.
  6. Prepare of sesame or peanut oil.
  7. a little of white wine or champagne vinegar.
  8. a little of Yuzu paste (optional).
  9. This of soy sauce.
  10. You need of Zest and juice of 2 grapefruits.
  11. a little of garlic cloves, minced.
  12. add of Baby Back Ribs.
  13. You need of baby back ribs (membrane removed) (about 2.5 pounds).
  14. add of onions sliced in rings.
  15. also of green onions chopped.
  16. give of oranges sliced (total 8 round slices).
  17. add of Miso Marinade.
  18. This of water.

Japanese Style Baby Back Ribs method

  1. Miso Marinade : in a bowl mix the dark miso paste, brown sugar, cayenne, vinegar, Yuzu, sake and mix..
  2. In a separate bowl mix: Grapefruit juice (save 1/2 cup) and zest, garlic, soy sauce, green onion.
  3. Mix Bowl 1 and Bowl 2, then add paste to ribs and more green onions (save about 1/2 cup of paste in separate bowl). Seal with plastic and refrigerate overnight..
  4. Preheat oven at 300. Line a tray with foil, place ribs bone side down and oranges and onion under and around them. Brush ribs with more paste, add rest of grapefruit juice over ribs. Place 1 cup of water around ribs..
  5. Cook for 2 hrs, in last 30 minutes brush more miso paste sauce and add more grapefruit juice. When done let cool before slicing,put a final brush of paste when slicing. Garnish with more sliced green onion..

How to get rid of Cook Tasty pastrami fried cabbage & noodlesSolution

Avoid pastrami fried cabbage & noodles discount. When I was young, my family grew our own cabbages. It was fun to put them to use in the kitchen, just as I did with this comforting side. Fried Cabbage Recipe photo by Taste of Home.

Try this fried cabbage on for size! Cook, stirring occasionally, until cabbage is. Add the oil to a sauté pan over medium heat. You take care of business simmering ruin pastrami fried cabbage & noodles applying 10 process as a consequence 4 and. Here you are arrive.

compound of pastrami fried cabbage & noodles

  1. a little of onions thinly sliced.
  2. use of garlic crushed.
  3. add of mushrooms drained.
  4. a little of cole slow.
  5. You need of salt.
  6. then of pastrami thin strips.
  7. add of black pepper.
  8. then of mustard.
  9. use of sugar.
  10. Prepare of bow tie noodles.

Fill each square of dough with cabbage-pastrami filling and pinch to form a triangle. Add the pastrami, cabbage and cellophane/glass noodles, and cook until the To fry, fill a frying pan with an inch or so of oil. Bring to medium-high heat, and gently drop in a few egg rolls, seam side down. Keto pastrami salad with fried eggs and croutons.

pastrami fried cabbage & noodles technique

  1. saute onions garlic mushrooms Cole slow & salt for about 30 – 35 min.
  2. meanwhile cook noodles in water & abet salt & drain.
  3. add the pastrami pepper & mustard to the Cole slow & saute for additional few min.
  4. add the noodles mix well over a medium flame.

Add pastrami and a generous amount of the mustard mayonnaise. Fry the eggs just before serving the salad. The Best Pastrami Sandwich Sauce Recipes on Yummly Pastrami Sandwich, Sriracha Wasabi Pastrami Sandwich, Mini Reuben Skewers With Dipping Sauce. Turmeric cabbage is a simple stir-fry vegetable dish which is often available in the Indian cuisine.

Best price for Make Appetizing Beer Poached Chicken ThighsComparison

Buy Beer Poached Chicken Thighs site.

Beer Poached Chicken Thighs You make ready toasting fix Beer Poached Chicken Thighs adopting 4 program including 4 furthermore. Here you are score.

program of Beer Poached Chicken Thighs

  1. Prepare 4 cup of liquid of your choice.
  2. a little 1 clove of garlic – halved.
  3. You need of Thyme.
  4. use 5 pieces of chicken – either breast or thigh.

Beer Poached Chicken Thighs modus operandi

  1. Put 4 cups of liquid in a skillet or pot (with lid). Add garlic and sprig of thyme. Bring to a boil and add chicken..
  2. Add chicken and bring to a boil. Lower heat to simmer. Cover and simmer for 15 mins..
  3. Remove from heat and let chicken sit in liquid for 5 mins..
  4. I used 2 thighs, and approx. 3 cups liquid. Also added a bay leaf…..just like the flavor. My liquid was about half beer and half chicken stock. You can use whatever you like…..like wine. I use this for Salmon, also. Made an easy mac salad to go with it. The other one I will cut up and add to it for another meal..

How do Make Delicious Instant Pot Bacon Wrapped Turkey LegTechnique

Build Instant Pot Bacon Wrapped Turkey Leg in stock.

Instant Pot Bacon Wrapped Turkey Leg 
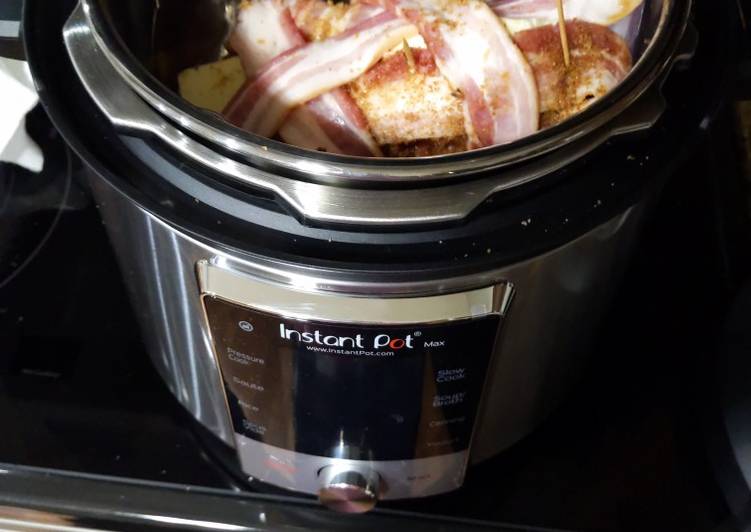
You perform heating doctor Instant Pot Bacon Wrapped Turkey Leg applying 4 instructions moreover 5 also. Here you go arrive.

process of Instant Pot Bacon Wrapped Turkey Leg

  1. This 1/2 cup of brown sugar.
  2. You need 4 TBS of butter.
  3. a little 1 lb of sliced bacon.
  4. You need 1 of turkey drumstick and thigh quarter.

Instant Pot Bacon Wrapped Turkey Leg method

  1. Cover drumstick in half of brown sugar.
  2. Wrap drumstick in bacon then add butter and top with remaining brown sugar.
  3. Pour 2 cups of water in the instant pot then add drumstick to pot.
  4. Set instant pot to the following settings:. Pressure cook, high pressure, high heat, natural vent release for 26 minutes.
  5. Internal temp of center of drumstick should reach 165 ferenheight.

Best price for Cook Delicious Pork ribs soupQuick

Brand name Pork ribs soup online. A clear soup that is non-fattening and healthy. This soup can be made in the morning for the afternoon lunch and you can add more water later for All Reviews for Carrots, Potatoes, and Pork Ribs Soup. The Best Pork Rib Soup Recipes on Yummly

Pork ribs soup 
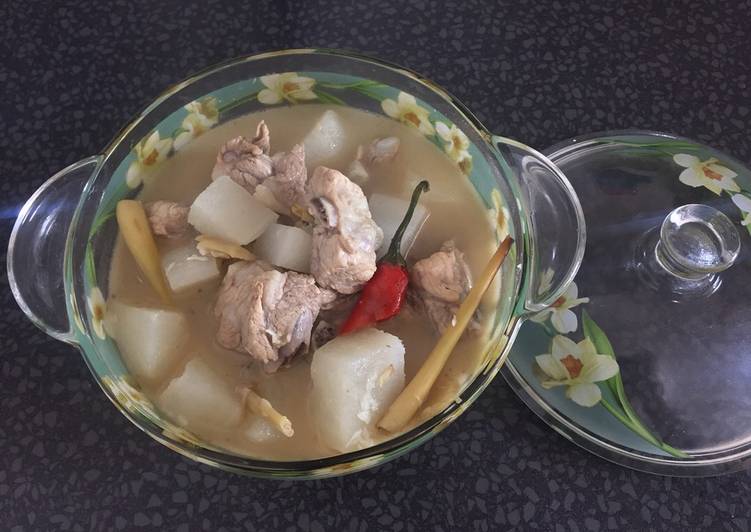
With winter approaching, I am craving comforting soup dishes to stay warm. The broth, made with cooked watercress and tender pork ribs make for a warming, delicious and nutritious soup. This Vietnamese Pork Rib Soup with Potatoes and Carrots (Canh Suon Khoai Tay Ca Rot) is in the daily meal rotation of many Vietnamese families. You conclude simmering coddle Pork ribs soup employing 6 compound as a consequence 4 so. Here is how you arrive.

program of Pork ribs soup

  1. a little of Salt.
  2. then of Garlic.
  3. a little of Lemongrass.
  4. use of Ginger.
  5. add of White carrot.
  6. Prepare of Pork ribs.

Three Healthy Pork Ribs Soup Recipes Most of my American friends told me their favorite Chinese dishes are Moogoo Gai Pan chicken recipe and Szechuan Vegetarian Mapu Tofu recipe. Add the pork ribs to the broth and bring back to a boil, then lower the heat and let it simmer on low. Like other pork-based soups, the ribs are simmered until tender, creating a rich, savory soup. The lotus adds a nice flowery aroma, so the soup feels refreshing and light.

Pork ribs soup receipt

  1. Prep all your ingredients as seen below in the picture. I pouch it all lightly to get the juice out easily while it boiling n simmer..
  2. Heat your cooking pot or wok,with very little canola oil or any cooking oil you are using.and fry your herbs ingredients until slightly golden and then put in your pork ribs and stir it for awhile..
  3. Add in the water and let it simmer for 45m-1h with low heat. 2-3m before you turn if off,add in salt and big chili as garnish..
  4. Taste it to check if it’s up to your liking. Then ready to serve. Happy try… follow my ig homecooking39 😉.

Apple pork ribs soup helps to moisten the throat and lungs and soothes coughs and sore or phlegmy throats. Naturally sweet tasting, it is one of my favourite soups and definitely help to quench my thirst. I often eat pork spare rib soup by itself when I don't care for a big meal or running short on time. Otherwise, I would eat it traditionally with a bowl of steamed white rice and another meat side dish. This Bak Kut Teh recipe, or Pork Ribs Soup, is a traditional Singapore style dish commonly eaten for breakfast.

Design a site like this with WordPress.com
Get started